
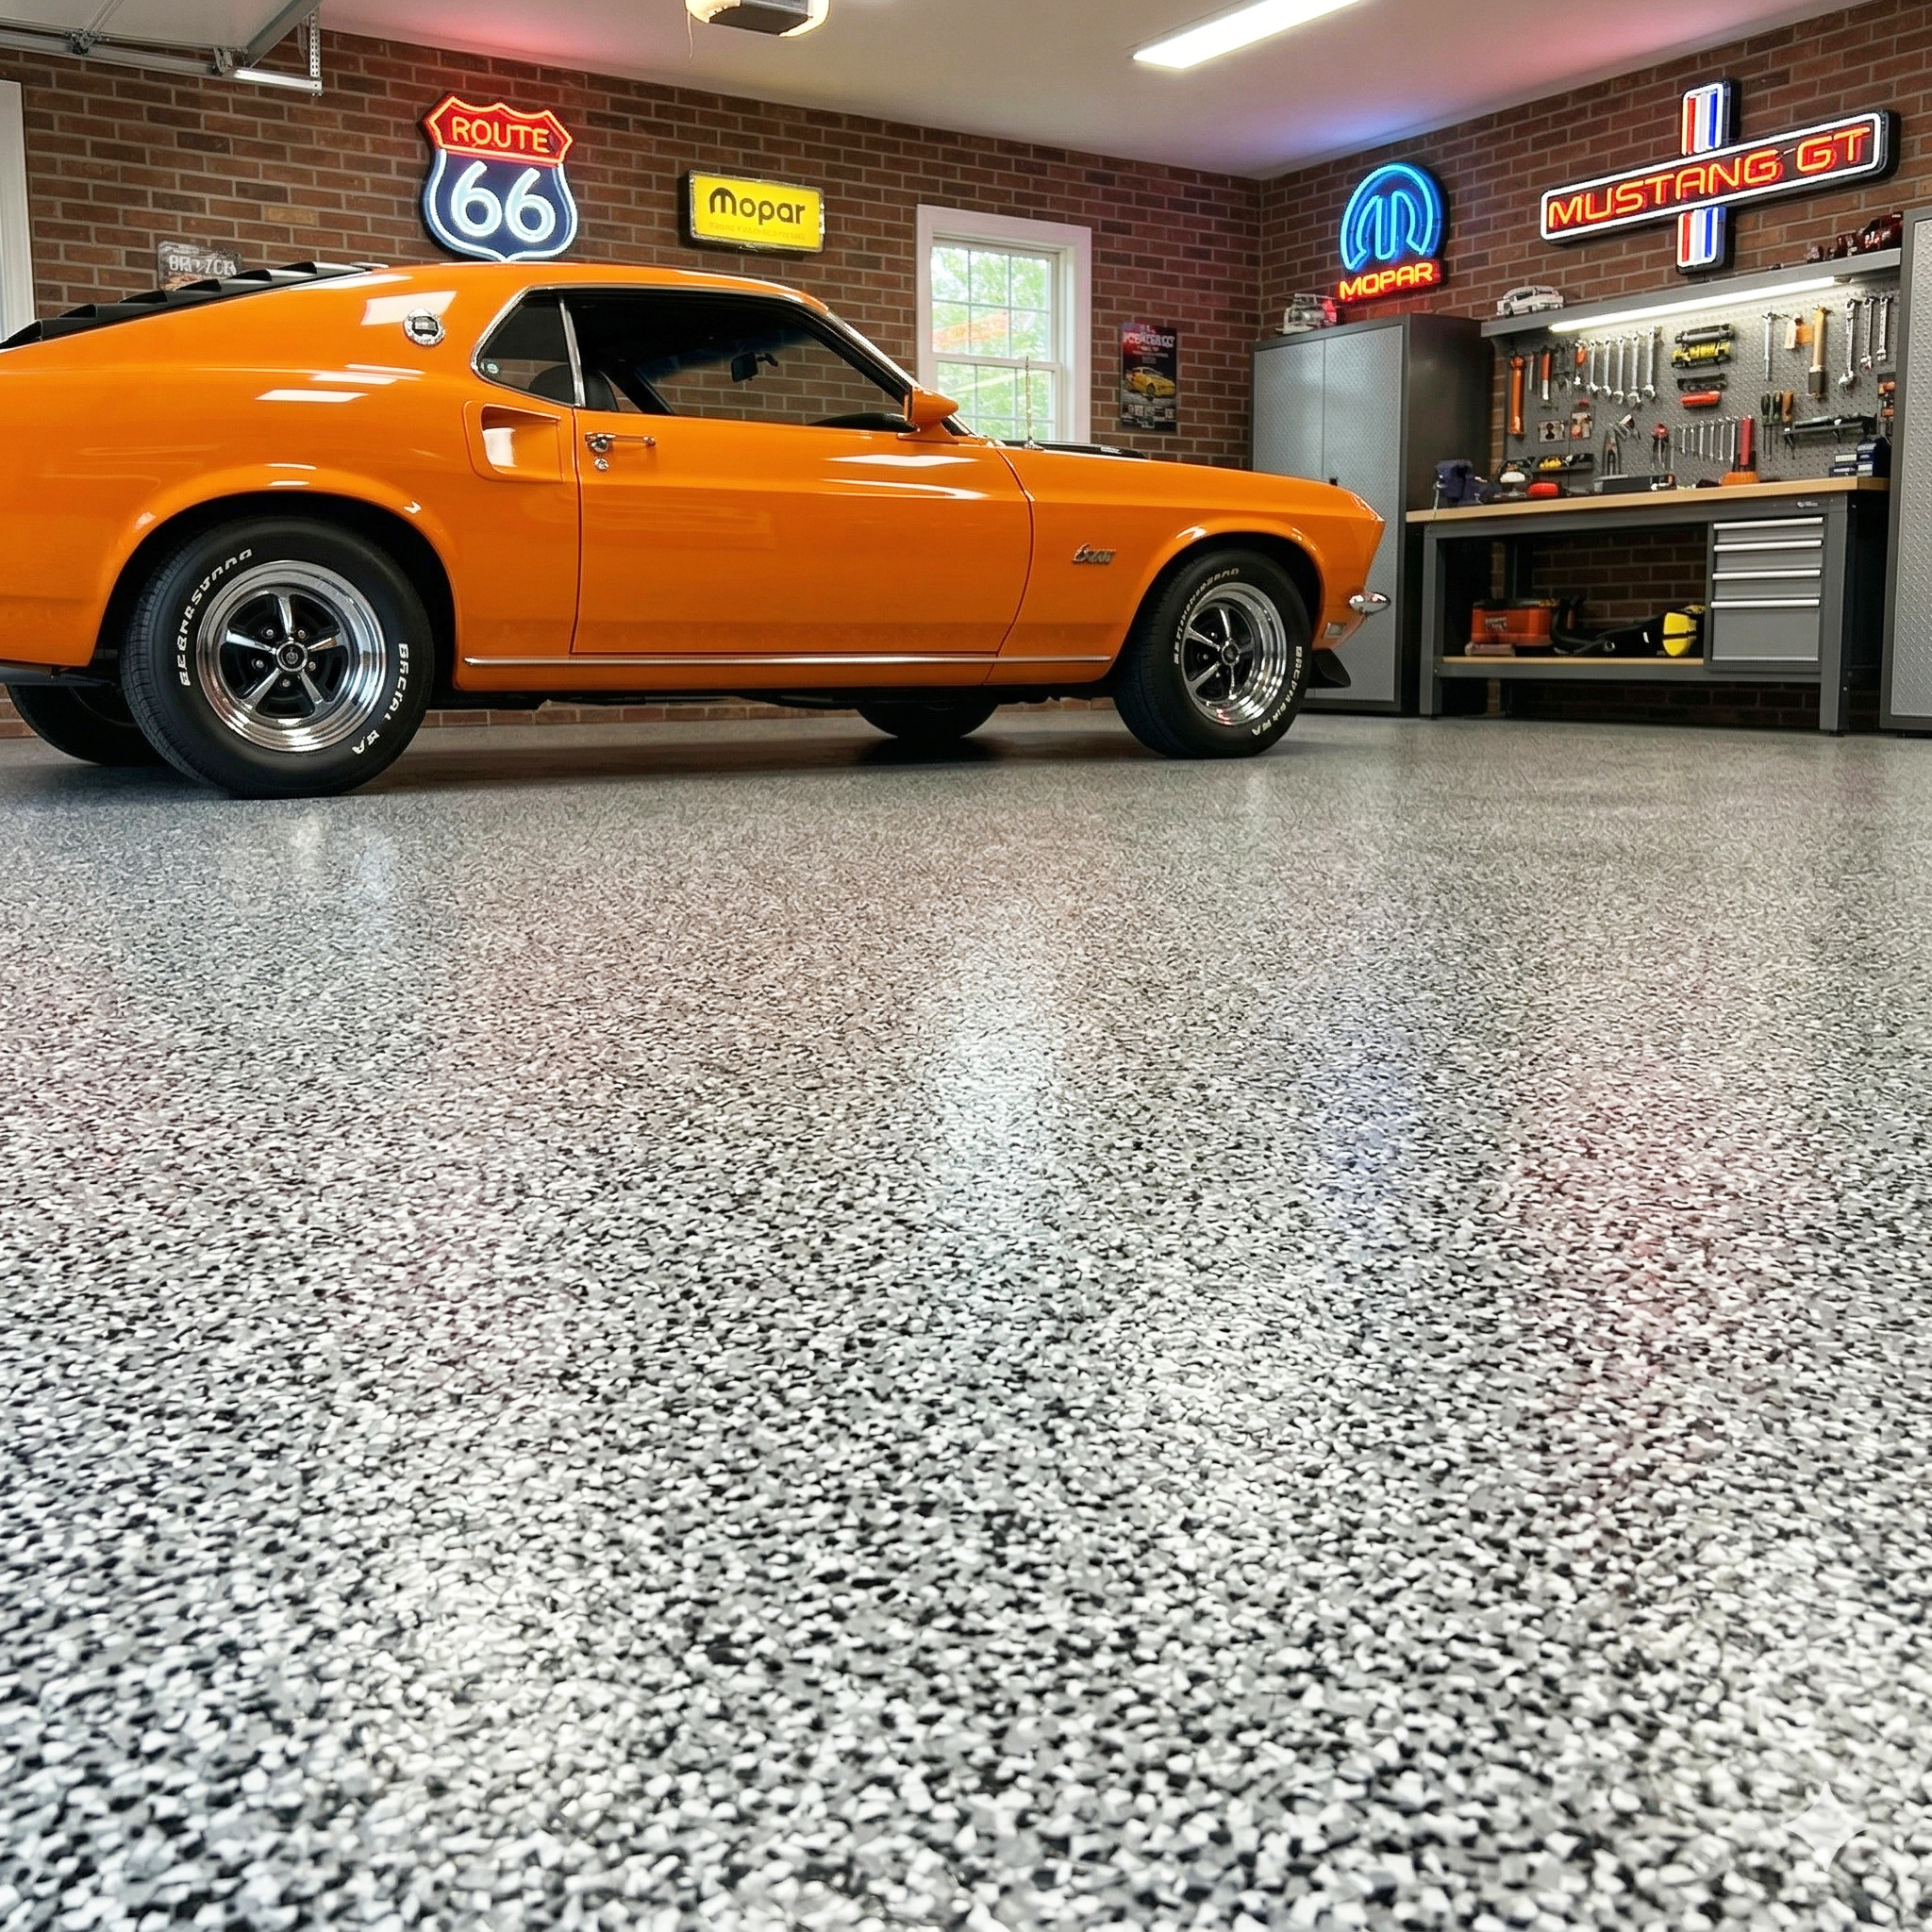
Transform Your Space Like a Pro: The Ultimate Guide to DIY Epoxy Flooring
Are you tired of looking at that dusty, oil-stained concrete floor in your garage or workshop? You’ve probably seen those stunning, high-gloss flake floors and thought, "I’d love that, but I don't want to pay a contractor thousands of dollars."
The good news? You don't have to.
At WiseBond Floors, we’ve revolutionized the way homeowners approach concrete coating. We believe that professional-grade results should be accessible to everyone—not just the experts with heavy machinery. Here is how you can transform your space in a single weekend.
The Game Changer: No More Grinding
The biggest barrier to DIY epoxy floors has always been the prep work. Traditionally, you had to rent a heavy, dusty floor grinder to "profile" the concrete so the epoxy would stick. It’s loud, messy, and intimidating.
Our SkipGrind™ Primer changes the game. This proprietary formula bonds directly to properly cleaned concrete, eliminating the need for mechanical grinding. By skipping the grinder, you save time, avoid a massive dust cloud in your home, and keep thousands of dollars in your pocket.
Why Choose an Epoxy Flake System?
Beyond the "wow" factor, there are practical reasons why flake floors are the gold standard for garages and high-traffic areas:
- Durability: It’s built to handle hot tires, heavy tools, and chemical spills.
- Safety: The decorative flakes provide a textured, slip-resistant surface.
- Hide Imperfections: The multi-colored chips (available in blends like Tuxedo, Midnight, and Saddle Tan) do an incredible job of hiding minor cracks or divots in your old concrete.
- Ease of Cleaning: A seamless floor means no more sweeping dust out of concrete pores. Just a quick mop and it looks brand new.
Pro Results in 3 Simple Steps
Our kits are designed for a "Weekend Warrior" timeline. Here is the simplified roadmap:
- Prep & Prime: Clean your floor thoroughly to remove oil and debris. Apply the SkipGrind™ Primer, no grinding required.
- Base Coat & Flake: Roll out the high-performance epoxy base coat. While it’s still wet, broadcast your decorative flakes "to rejection" (meaning you cover every inch of the wet epoxy until no more can stick).
- The Top Coat: Once cured, scrape away the excess flakes and apply our industrial-strength polyaspartic top coat. This provides that crystal-clear, UV-stable, rock-hard finish.
You Really Can Do This
We hear it all the time: "I'm not a pro; what if I mess it up?" WiseBond kits are engineered specifically for first-timers. We provide the exact ratios, the specialized tools, and the step-by-step guidance to ensure you don't just "paint" your floor, but actually finish it like a professional.
Ready to stop dreaming about your dream garage and start building it?
Explore our full range of DIY Epoxy Flake Kits and find the perfect color for your space. Your floor (and your home value) will thank you!
FAQ
Why is mechanical grinding or acid etching necessary before applying DIY epoxy flooring? Mechanical grinding or acid etching is necessary because it opens the "pores" of the concrete substrate. This process creates a rough surface profile that allows the epoxy resin to achieve a strong mechanical bond. Without this step, the epoxy will simply sit on top of the concrete and is highly likely to peel or delaminate over time.
How does the "pot life" of epoxy resin affect the installation process for a DIY project? "Pot life" refers to the limited window of time a user has to apply the epoxy after the resin and hardener are mixed. Once the chemical reaction begins, the material will start to thicken and eventually harden in the mixing bucket. DIYers must have all tools ready and a clear application plan to ensure the product is spread across the floor before the pot life expires.
What role does a primer coat play in preventing bubbles in an epoxy floor finish? A primer coat acts as a sealant for the porous concrete floor. By applying a primer first, you seal off air pockets within the slab. This prevents "outgassing," a phenomenon where air escapes from the concrete and creates bubbles or "pinholes" in the thick, wet epoxy topcoat during the curing process.
What are the specific environmental requirements for curing epoxy flooring indoors? To cure epoxy correctly, the environment should ideally be between 60°F and 85°F with low humidity. Excessive moisture can cause a chemical blush or cloudiness in the finish, while temperatures that are too cold will stop the chemical reaction entirely, preventing the floor from ever reaching its intended hardness and durability.
How do 100% solids epoxy kits differ from standard water-based garage floor paints? 100% solids epoxy kits consist of pure resin and hardener with no carriers that evaporate. When the product cures, it maintains its full thickness. In contrast, water-based paints contain high levels of water that evaporate, leaving behind a much thinner, less durable film that is susceptible to hot-tire pickup and chemical staining.
Pricing & Value
Is DIY epoxy flooring more cost-effective than professional installation? Yes. While professional labor can cost $5–$12 per square foot, a DIY kit allows homeowners to achieve similar professional-grade results for a fraction of the price, typically focusing costs only on materials and tool rentals.
How does the longevity of epoxy flooring impact its long-term value? Epoxy flooring is a high-value investment because it lasts 10–20 years with proper care. Its durability reduces the need for frequent concrete repairs or floor replacements, saving homeowners significant maintenance costs over time.
Does adding an epoxy floor coating increase the resale value of a home? Yes, a professionally finished epoxy garage or basement floor increases home value by improving "curb appeal" and providing a clean, moisture-resistant, and functional living space that appeals to modern homebuyers.
Key Takeaways
- Surface Prep is Critical: The success of the floor depends entirely on cleaning and etching the concrete to ensure a permanent bond.
- Temperature Matters: Always monitor indoor humidity and temperature to avoid curing failures like cloudiness or tackiness.
- Choose Solids Over Water-Based: For maximum durability and a "thick" professional look, use a 100% solids epoxy kit rather than thin retail paints.
- Work Against the Clock: Be mindful of the "pot life" after mixing; epoxy has a limited working window before it hardens in the container.
- Sealing Prevents Defects: Using a primer coat is the best way to prevent air bubbles (outgassing) from ruining your smooth, high-gloss finish.